- Creality Ender vs Anet A8 [2022]: Which is Better? - April 14, 2022
- TEVO Tornado Review [2022] All You Need To Know - April 6, 2022
- Anet A6 Review [2022 UPDATED Version] - April 5, 2022
The 3D printing industry is always full of new developments, products and advancements in the near future that are easy to get excited about if you are a 3D printing fan or even just a fan of technology.
However, aside from much of the technological pioneering in the 3D printing world, many companies have also made it their goal to make 3D printing accessible and affordable for as many consumers as possible.
Table of Contents
About the Companies
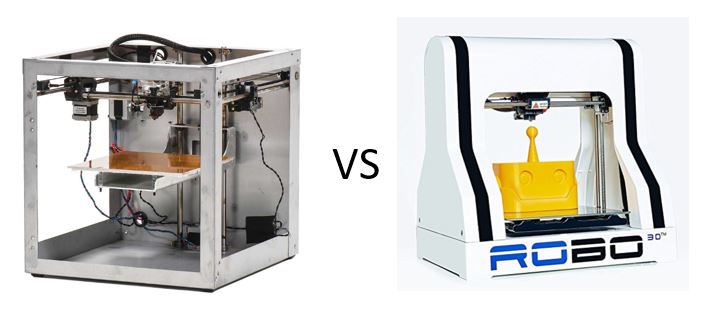
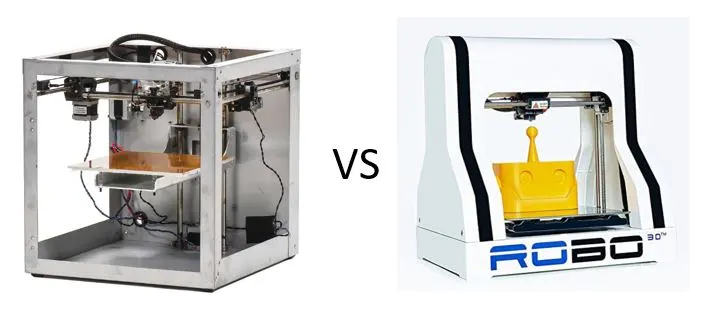
Two companies that have played a major role in accomplishing this over the last several years are Robo and Solidoodle. Solidoodle offers a range of 3D printer models while Robo offers the R1 Plus with plans in the works for three additional models to be made available soon.
Robo is based out of San Diego and is only just now over three years old. The company was founded by several university students with the stated intention of bringing 3D printing to as many consumers as possible in an affordable way and without sacrificing quality. Solidoodle has been in the market for several years and already has released several versions of their Solidoodle 3D Printer. Fittingly, the Solidoodle 3 is the 3rd generation of their impressive design but they also offer the Press, Workbench and Apprentice models, all with variations in capability, price and features.
Both companies have had an amazing impact on the entire 3D printing industry by offering high-quality 3D printing capability and affordable 3D printing machines. Let’s have a look at two of the most popular units on the market made by these 3D printing companies and see what they have to offer both beginner users and experienced users alike.
Getting Started
Robo R1
The R1 ships as a fully assembled unit so it only takes a few minutes of setup once received to begin your first printing project with the unit. The simple setup is a matter of connecting the unit to a source of power, downloading the necessary software and ensuring the unit is calibrated properly. The unit comes already calibrated from the factory but you may need to make a few adjustments depending on what type of printing job you are preparing for and if anything has shifted during the shipping process.
A 300g spool of filament is included along with all of the components needed to begin 3D printing immediately. The unit is equipped with five Nema 17 motors, a single extruder and has a heated bed. It is capable of using different types of filament and the software easy to learn and navigate right from the start.
Solidoodle 3
Getting started with the Solidoodle 3 is relatively straightforward as you just need to get the software setup, connect the printer to a power source and attach it to your computer. After that, it is a matter of calibrating the unit. Calibration is accomplished by adjusting several screws and some trial and error, not the most convenient method but it does not take all that much time either. It is not uncommon to have a few errors due to inaccurate calibration at the very beginning but once you have it tuned in properly things should go smoothly.
A couple of items you may notice right away is there is no SD card slot on the unit which means you can only operate it while connected to your PC. Additionally, there is no readout for certain settings such as temperatures and similar settings which would be helpful. Overall, getting started is relatively painless once the software is downloaded and installed but a few more convenience features might make things a bit better.
3D Printing and Features
Robo 3D R1 Plus
The automatic leveling feature makes adjustments a snap and makes this unit much easier to work with compared to other models that lack this feature. Trying to manually make adjustments, especially for beginners, can sometimes become time consuming and difficult.
“The printer is capable of print resolutions all the way down to 100 microns, which is very impressive for a 3D printer in this price range.”
This gives you plenty of flexibility and the capability to print high-quality products with exceptional detail.
Robo upgraded the rods and bearings on the R1 and the overall linear motion of the printer is much improved compared to previous models, which provides better 3D printing results. The R1 Plus can use PLA, ABS and other specialty filaments giving you a fair amount of choice for which material will suit your needs and projects best. It is not the fastest 3D printer on the market but its printing speeds are above average and certainly better than many other models in the same price category. The printer has a nice sized print bed at 10 x 10 and the build area is 10 x 9 x8.
Key Specs
- Automatic Calibration
- Micro SD Card
- Spool of filament is included
- Upgraded linear motion
- Rods & bearings improved
- PLA/ABS/LAYWOOD/Specialty filaments
- One extruder
- 10 x 10 print bed
- 10 x 9 x 8 Build Volume
- 4mm nozzle
- 75mm filament
- Five Nema 17 Motors
- Resolutions down to 100 microns
Solidoodle 3
As mentioned above, we did experience a few errors at the start but they were nothing significant. A few tweaks to the calibration of the unit and things went smoothly from there on. The printer was actually quite impressive in action and provided some excellent results printing products with a lot of detail. It is capable of resolutions down to 0.1mm and it is capable of printing products with a relatively large amount of detail.
“We found the printing speed to be a little slower than the R1 and the noise level just above as well but not enough to make a huge difference.”
It would probably be more noticeable the more experienced you are with 3D printing. While the software worked well and operations went smoothly overall, it does not provide the same level of options as the R1 and seemed a little more basic to us. The software and printing functions are average and certainly acceptable but overall did not overly impress us. One nice feature is you can easily import product designs from Thingiverseso as the unit can work with multiple file types.
When we did come across questions, we found the available support on the Solidoodle website to be less than ideal. In fact, at one point the page even displayed that the support service was completely unavailable and was expired. Not exactly sure what happened here but even when it was working options and information was limited and difficult to find.
Key Specs
- ABS or PLA filament
- Build area 8 x 8 x 8
- Durable metal construction
- No SD card slot
- USB connection
- Easy setup
- 75mm filament
- Compatible with Windows, Mac or Linux-based systems
- .stl and .dxf file compatible
Final Thoughts on the Solidoodle 3 vs R1 Plus
As far as overall 3D printing results, we thought both printers did a nice job and provided more than acceptable quality given their under $1,000 price tags. However, the R1’s features and functions seemed much more refined compared to the Solidoodle 3.
The software had smoother navigations and seemed a bit more user-friendly. The printer was a little faster and was a bit more refined as well. While we can’t say anything really negative about the Solidoodle 3 and believe it is a good overall value, the R1 Plus just outperforms it by a little in almost every category.
Bottom Line: Comparing each unit dollar for dollar the R1 Plus appears to be a little better value right now but that could change with a few upgrades to the Solidoodle. Go with the Robo R1 Plus, as the safer bet.