- How to Remove 3D Print From Bed - May 31, 2022
- Autocad vs Inventor: Which Software is The Best? - April 5, 2022
- Autocad vs Revit [2022]: Which Is The Right Choice? - March 31, 2022
With Valentine’s Day on the calendar every February, everybody’s thoughts naturally turn towards chocolate this time of year – even within the 3D printer world. Believe it or not, chocolate is a fairly common 3D printing material for those who like to mix things up. You can use it almost exactly like you would any other material, with just a few tweaks to make its unique properties work the way you want. And even though there are plenty of other filaments that you can use to store food and eat from, nothing beats combining two hobbies into one unexpected joy that you can literally taste! I’ll discuss how 3D printing with chocolate works, then give some insights on how to get your Chocolate 3D Printer DIY set up going.
Table of Contents
How does 3D printing with chocolate work?
Making shapes with chocolate has traditionally been limited to what you can make with molds and melted down molten chocolate. Because molds are a process that carves the shapes out of the material poured into them, old-school chocolate making is just like industrial subtractive manufacturing and comes with all the same pitfalls. Can’t afford all the equipment you need up front? Need to make changes to your design once the mold is completed? Don’t have the time it takes to perfect everything, so you don’t have to change your design mid-process? Tough. You’re out of luck with any sort of traditional chocolate making.

But 3D printing, as an additive process, gives you a lot of advantages that let you experiment with your chocolate. Since you are adding material through layering, you don’t have to stay within the geometric confides of a mold; since you are basically drawing the design into 3D space, you can also change it a lot easier than if you were depending on a mold. It isn’t practical for mass producing chocolate, but if you want to make your own intricate one of a kind creations for fun or profit, 3D printing with chocolate may just be your best bet.
What are the pros of 3D printing with chocolate?
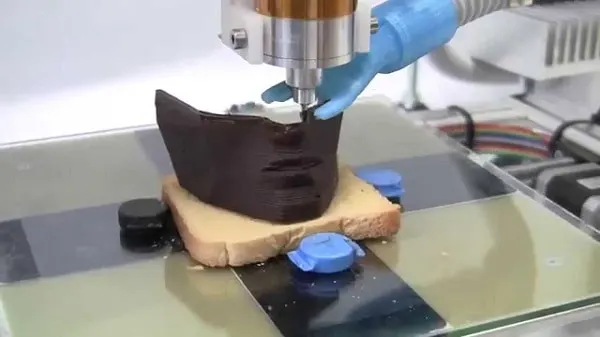
- Translation of skills. The second best thing about 3D printing chocolate (close behind being able to eat your creations) is that it’s so close to 3D printing with more common materials that you can use the same designs and computer-aided drafting programs you feel most comfortable using without worrying about learning a whole new process. Overall, chocolate 3D printers work the same as other 3D printers – they use the same fused deposition modeling process where an extruder head moves around a printer bed and lays down melted chocolate in designated layers which are built into the 3D object and cooled to harden into place.
- The intricacy of design. With a 3D printer, you’re able to create chocolate designs that would never be possible with the traditional mold method. Even other additive methods such as chocolate sculpture depend on your own steadiness of hand, limiting you to human frailty. 3D chocolate printers let you take advantage of both the uniformity of machine building and your extensive imagination.
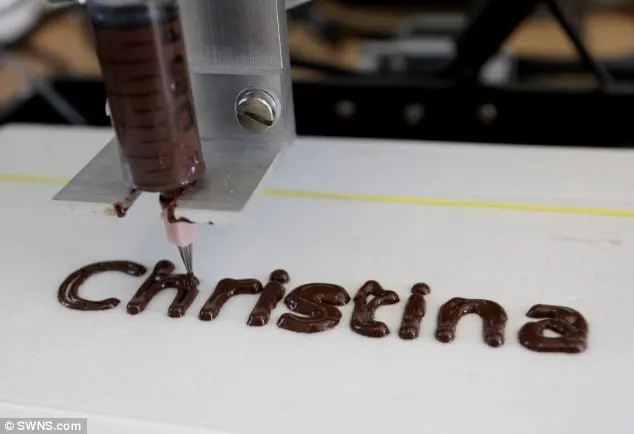
- High resolution and accuracy. The low viscosity of chocolate means that it uses what is called inkjet 3D printing. That means the print head is electrically heated to establish pulses of pressure which push drops of material from the nozzle. This can be used for either a continuous stream, as in when you’re making an all-chocolate creation, or as a way to dollop sections of chocolate onto another creation. Either way, inkjet 3D printing results in amazing accuracy on intricate details. The pulse process helps control the material flow so it can navigate like a skilled chef wielding a pastry bag.
However, there are some fundamental differences that you must be aware of before you decide to melt a few Hershey’s bars and pour them into your current rig. Don’t do that! You’ll ruin your machine and won’t get a result remotely resembling what you want anyway. You do need equipment that is specific to the intricacies of chocolate as a printing material, so read on to find out exactly what you need to know to make your 3D printing process even sweeter.

What are the difficulties with 3D printing in chocolate?
- Working texture. The physical properties of chocolate make it perform a lot differently than your traditional 3D printing filament. Usually, even the most obscure material is mixed in with a thermoplastic, which ultimately allows the material to act more or less like the thermoplastic when it gets into the machine. But chocolate does not, and mixing it into a thermoplastic isn’t an option if you want to enjoy your creation as it’s meant to be. Chocolate is both too soft and not pliable enough to work with a traditional extruder. You have to melt the chocolate to make it flow in the lines necessary for the machine to draw out your design. However, when it’s flexible enough to work with, chocolate also does not have nearly the same hold as plastic does. It doesn’t harden quickly at room temperature, so it makes it more prone to lose its shape due to gravity or other environmental disturbances.
- Structural delicacy. Chocolate’s unique 3D printing properties result in a material that is as delicate as it is versatile. Because it has to stay in a melted state while being manipulated, it also has to be cooled very quickly as it’s being printed so that the structure has a solid frame to fall back on. That’s especially true if you’re planning on printing chocolate with a lot of gaps or thin areas; if you don’t take the proper amount of care, these areas are vulnerable to snap right off and ruin your structure.
- Can’t be stored as a filament. Chocolate is also too soft to be wound into the same kind of hard spooled filament that is typical for extruder printing. When you use it for 3D printing, you have to keep the liquid chocolate in a cartridge that is constantly heated to keep it melted so it can run through a syringe that acts as the extruder. This is a messy storage need for something that takes hours to complete its printing, and continuously heating an entire cartridge of material rather than only the material being used in the printing at any given moment is a finicky, energy-sucking process. Make sure you have the time and patience to stick with it.

What materials do I need for a chocolate 3D printer DIY?
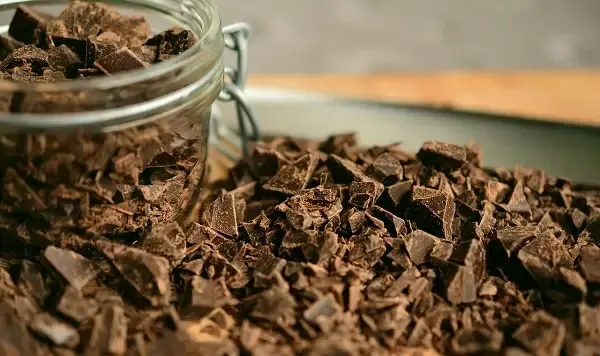
To combat these structural issues, 3D chocolate printers use a paste-like material made from a blend of different kinds of chocolate. Dark, white, and milk chocolate all have different melting properties that make them easier or more challenging to work with depending on your project and the printer you’re using. Each type is structurally chocolate with slightly different structures that render them different allotropes, or variations of crystal patterning in their molecules.
- Dark chocolate has a higher melting point than milk or white chocolate, between 30 and 32 degrees Celsius. This is because it has a higher proportion of cocoa to milk fat in its mixture. This means that dark chocolate is structurally firmer, but it also takes longer and more energy to melt and maintain the liquidity needed for extrusion. It has a solidifying temperature between 20 and 28 degrees Celsius.
- Milk chocolate, on the other hand, has more milk fat in proportion to its amount of cocoa, so it will melt around the same temperature range that dark chocolate will solidify. Milk chocolate is also more likely to produce fat and sugar pockets if it’s not melted slowly enough; while that won’t affect its taste, it can affect the structural integrity of what you’re trying to build.
- White chocolate doesn’t contain any cocoa solids at all, but it is made with cocoa butter, so it’s more prone to burning as it’s being melted. It scorches at around 44 degrees Celsius, so be extra careful if you want to use it for your 3D printer. You can mix and match all the types of chocolate for whatever combination of properties you need in your finished product.

What equipment do I need for a chocolate 3D Printer DIY
Although you can outfit a regular 3D printer with several of the necessary details needed to convert it to a 3D food printer, chocolate itself takes some extra considerations, so it’s generally worth it to find a printer that is specifically equipped for the job.
- Syringe extruder. First and foremost, you’re going to have to find an extruder that works like a syringe dispenser rather than a traditional 3D printing extruder. This is going to be the easiest modification you can make – there are detachable versions you can pop onto your current 3D printing rig, and there are even plenty of open source designs if you want to go meta and print your own printer extruder. However, if you have the rest of the necessary adjustments on your printer and just need to switch out your heating head, remember to find one that is heat resistant to the temperatures you’ll need for chocolate and FDA rated as a surface that’s safe to eat from. This will be easy if you’re working with a premade spout – they know what’s up – but if you’re printing your own, pay attention to the materials you’re using. The money you save will not be worth a broken hot head or plastics poisoning.
- Material cartridge. Chocolate is a building material that needs to stay liquid while you’re using it, and unfortunately nobody’s figure out a way to liquify only the parts that are printing. And for an added wrinkle, chocolate can’t stay at the correct consistency without constant heating – unlike that frosting you’re eyeing, or mashed potatoes, which are both molecularly stable and liquid enough to run through a food extruder at room temperature. So for chocolate, you have to find a printer that has a material warmer that will keep it at the exact right temperature for 3D printing the whole time you’re using it. That’s easier than it sounds – many chefs and 3D printing engineers alike have wondered about it before you, so there are a lot of options for either a rig to add to your current printer or a printer that’s devoted exclusively towards chocolate. We recommend the latter, not only because it already has all the necessary accessories integrated into its design, but because it was built with chocolate specifications in mind, so you don’t have to worry about your regular 3D printer not being able to handle the adjustments needed.
- Cooling fan. This is a vital addition to your chocolate 3D printing setup. If you’re shopping for a printer that can specifically print with chocolate, don’t believe it unless it has a fan built in to cool the chocolate as it goes. This isn’t an add-on that would be nice to have, or even just makes the process easier for you – this is necessary to keep your printed chocolate in its shape throughout the printing processes. Otherwise, you’ll end up with a broken mess of a chocolate shell. Cooling fans are such a simple yet complete fix.
Some Final Thoughts: How to Find the Best Chocolate 3D Printer DIY tools
Because there are a few very specific needs for 3D printing with chocolate, we recommend buying a printer that is made for this specific purpose. There are a lot OF 3D Printers on the market that range from around $500 for a starter kit to around $6,000 for a full-on kitchen approved rig. Just like when you’re shopping for any 3D printer, know your skill level and be realistic about the use you are going to get out of this. Buying a 3D printer specifically for chocolate might sound like an extravagance, and it is if you aren’t going to be using it enough to justify the cost, but if you have any interest in chocolate 3D printing, you should find a chocolate 3D printer you can borrow or use jointly before deciding.
3D printing with chocolate is a great way to expand your 3D printing horizons. It’s a sweet way to test your design skills as well as add a culinary element to your hobby – or business! Although you won’t be able to mass produce chocolate bars on a practical scale or add ingredients beyond variations of cocoa to milk fat, you will be able to craft meticulous, one of a kind edible objects with little more trouble than 3D printing with your favorite thermoplastic. If you’re an aspiring Willy Wonka, coming up with creations that you fear could only be completed in your head, check out the range of 3D chocolate printers out there. You’ll be very pleasantly surprised what a good inkjet extruder and your pure imagination can bring to life.


