
- Creality Ender vs Anet A8 [2022]: Which is Better? - April 14, 2022
- TEVO Tornado Review [2022] All You Need To Know - April 6, 2022
- Anet A6 Review [2022 UPDATED Version] - April 5, 2022
A recently popular 3D printing company, Creality, is well known for their inexpensive and high performing 3D kit printers. The company was founded in 2014 and is located in Shenzhen, China. They offer two series of DIY 3D printers and one line of completed machines. Most known for the popular CR-10 3D printer. Creality is becoming a well-known name in the 3D printing industry.
Not surprisingly, Creality 3D printers have grown large followings on the internet and amongst like-minded 3D printing enthusiasts. A quick internet search will return a ton of content around the Ender 4 3D printer. You will see anything from first impressions, unboxings, assembly how-to’s, first prints, and best practices. The list goes on and on.
If you have a question about the Creality Ender 4 or need some advice, you will surely find it on the internet.
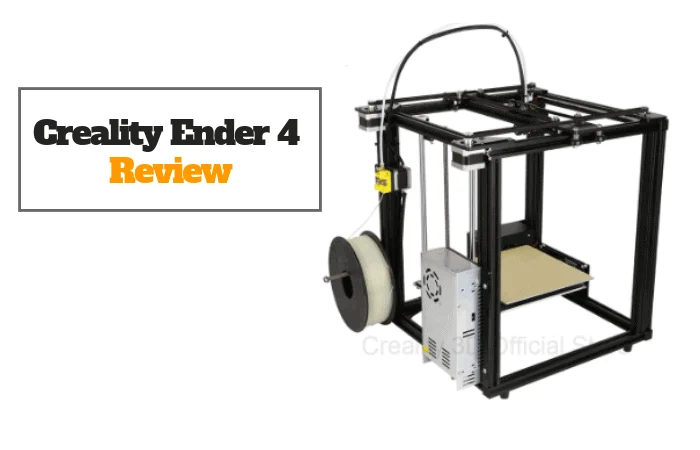
Now, this large following and popularity doesn’t just happen for any 3D printer. The Creality Ender 4 is a budget-friendly 3D printer that is well-built and well-designed. It is a fairly compact and lightweight machine. The frame is sturdy and simple but does a great job at what it is designed to do.

It is a pretty impressive machine that can be found for around $300 online. This pricing is pretty on par with the rest of the kit 3D printers on the market. Since it is a budget printer, it is not the best of the best. But the Creality Ender 4 is a great 3D printer for hobbyists and those looking to get their hands on their first 3D printer. Now let’s look at what it offers.
Table of Contents
Core Features of the Ender 4:
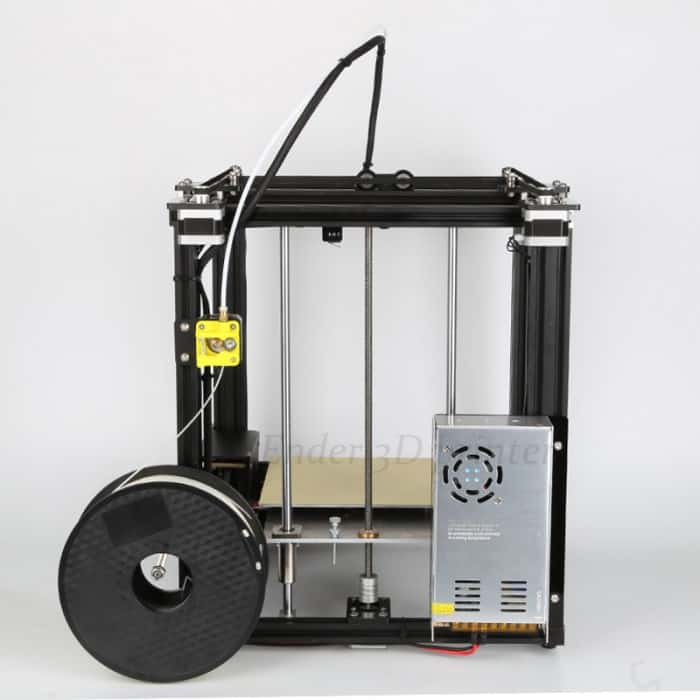
User-Friendly: Overall, the design of the Ender 4 is quite easy to work with. It has an all-aluminum frame that forms an open cube for easy access to the print bed. The front of the machine has a knob-controlled small LCD display, which gives the user almost total control of the machine from basic settings to auto-leveling and start or stopping prints. The back on the machine can mount a filament spool. This is an ideal spot as it is out of the way of you and the nozzle.
As for getting the Ender 4 built and running, users can accomplish this through an easy 6 step process. The pre-loaded SD card that is packaged with the prints has all the instructions for the Ender 4 and Cura software.
Once you have the machine built and begin printing with it you will notice just how little noise the Ender 4 operates with. Occasionally, you may notice a slight high-pitched whine from the motors. But other than that, it is almost silent while printing.
Unique Aspects: The Ender 4 can also be equipped with a laser engraving head. We have seen this on a few other machines and seems to be somewhat of a gimmicky feature. However, there are users out there whole really enjoy using the small engraver to add a personal touch to their creations. Most people will use it on wood, but some fabrics and a handful of other materials will work as well.
An LED Strip on the Ender 4 really lights up the print bed. It runs along the top cross-sectional pieces of the printer and is very bright. Some may opt to turn it off, but using it really allows you to see just how fine of detail the Ender 4 is capable of printing.
Ability to Adapt: One of the best parts of a DIY 3D printer is how versatile they can be. The Ender 4 uses a swappable nozzle so you can adjust the diameter depending on your print. You can get the very fine details with a 0.2mm nozzle or print with speed and thick lines using a 0.8mm nozzle. You can always stick with an in-between at 0.4 or 0.6mm. The print head can move up to 200mm/s and will reach temperatures up to 260°C. The flexibility of the print head and nozzle means you can print with a wide range of filaments.
Keys Specs of the Creality Ender 4:
| Build Area | 8.6” x 8.6” x 11.8” |
| Print Speed | 200 mm/s |
| Filament Types | PLA, ABS, FLEX, Wood PLA, Rubber (TPU), PETG |
| Layer Resolution | 50 microns |
| Extruders | 1 |
| Nozzle Diameter | 0.4 mm (adjustable to 0.2 – 0.8mm) |
| Price | Find the latest pricing here |
Pros of the Creality Ender 4:
A few things to love about the Ender 4:
Easy Upgrades: If the Ender 4 isn’t up to your standards right out of the box or you feel it is missing an important piece you can easily print and purchase your own upgrades for it. For example, you can easily make yourself a part cooling fan that attaches to the extruder. Since the Ender 4 doesn’t come with the fan you may notice some slight warping in a few prints depending on the filament. You can either design your own or reach out to the online community for a 3D model to print the fan that you need.
Some other popular upgrades we have seen include flexible filament adapters, spare parts for the machine, and corner brackets to attach to the frame and add a little extra stability and strength. There are dozens of ideas online and we are sure you can think of some on your own.
Heated, Auto-leveling Bed: Something that is often missed on budget DIY 3D printers is a heated bed and auto-leveling. Luckily, Ender 4 has both. The auto-leveling works fantastically and is very consistent each time. This is always a great thing to have as fidgeting with the small fasteners and nuts can be a pain when trying to level the bed in between prints on your own.
The aluminum bed heats evenly and quickly. It is a great addition as this is a crucial feature for using some filaments that you don’t want cooling down too quickly.
Compact with a large build volume: Another great feature on the Ender 4 is the large build volume stored in a fairly compact design. The printing area at 8.6” x 8.6” x 11.8” is on the mid to higher ender of build space when it comes to 3D printers. And you get all of that with an overall footprint of just 14.5” x 14.5” x 20”. The Ender 4 does not require a ton of desk space, which is great for small workstations or tight areas where you want to set up your machine.
Con of the Creality Ender 4:
Something that is not the greatest about Creality Ender 4:
H-bot Design: The Creality Ender 4 is often mistaken for a CoreXY 3D printer when it is an H-bot printer. CoreXY printers are square shaped like the Ender 4, but they utilize two belts and two stepper motors to control the movement of the extruder. Some people believe a CoreXY system is better than the H-bot, but two belts and motors just means that there are more chances of something going wrong. Often the tension of one of the belts will be the main issue. This main concern of an H-bot design deals with uneven forces on the x-axis, which can lead to misalignment and warping over time.
Final Take:
A great printer for the price, but you may run into some headaches.
Creality did a great job with the Ender 4 as they have with their other 3D printer models. By now, you know what to expect from Creality and the budget-friendly kit machines. They produce sturdy, consistent, and surprisingly accurate machines. The Ender 4 is no different. It has a large build area, an all-metal design, user-friendly set up and operation. As well, you get the large online followings and communities to help you along the way.
But it is still a kit 3D printer. You may run into some issues with parts not always aligning or missing a screw or two from the box. It’s not the end of the world and you get what you pay for, but this just might not be for everyone. If you don’t mind challenging yourself to build a 3D printer and want to have the ability to customize it and upgrade it how you please, then the Ender 4 would be a great option for you.
Recommended Reads
- Formlabs Form 2 vs Ultimaker 3 Comparison: Which One Would You Like More?
- Ultimaker 2 vs MakerGear M2 Comparison: Which Is Right for You?
- AutoCAD vs. Solidworks for 3D Printing – Which is The Best?
- Creality CR 10 Review
- Ender 5 Review
- Tevo Tornado vs Creality CR 10
- Creality CR 10 vs Prusa i3
- The 10 Best Ender 5 Upgrades