- How to Remove 3D Print From Bed - May 31, 2022
- Autocad vs Inventor: Which Software is The Best? - April 5, 2022
- Autocad vs Revit [2022]: Which Is The Right Choice? - March 31, 2022
Table of Contents
Your 3D Print is Done! Now What?
My favorite part of 3D printing is seeing my object completed in all its glory. It’s a tangible manifestation of all the hard work that went into making it. As a library worker who helped demonstrate 3D printers in a teen makerspace, I also got to see how proud the kids were to create something from their imagination.
But we also learned several hard lessons in patience when eager hands tried to take a completed object off the heater bed, only to have it warp, crack, or crumble because part of it had stuck.
Fortunately, there are several ways to ensure that doesn’t happen to you. Following the advice below will show you how to remove a 3D print from the bed without incident.
Steps to Remove Your 3D-Printed Object

Keep Your 3D Printer Bed Clean
Before you start any actual printing, it’s crucial to make sure your machine’s print bed is cleared of any dust, dirt, grime, and residue from previous projects.
Printing onto a pristine bed will ensure that your print stays even, which is especially crucial for its first layer. A level foundation will make your finished print much easier to take off the print bed in one unharmed piece, so make sure your projects have a clean base on which to grow.
Add Specialty Adhesive Materials
There are many products that help you find that perfect balance between an adhesive heat bed and 3D prints that don’t stick too hard to it. You can find 3D printer-specific accessories such as heat bed adhesive film and changeable surface plates where you get your 3D printing supplies.
You can also use several everyday products that may fit your budget and timeframe better — glue sticks and hairspray are good for coating your heating bed before you print so your 3D object stays in place but comes away easily when it’s ready.
Adjust Your Printer’s Settings
Another step to take before you start your project is to make sure your 3D printer’s nozzle is not too close to the printer bed while extruding. This causes the filament to spread out too much over the heat bed, thus making it cling to the surface more than you want. If you’ve had issues with getting finished objects off the printer bed before, calibrate the z-axis of your extruder nozzle.
You can do that manually or with the automatic calibration settings that some 3D printers offer. Also, listen to your 3D printer while it works. If you hear a clicking noise, the extruder is too close to the bed, and you should recalibrate.
Let Your Finished Object Cool
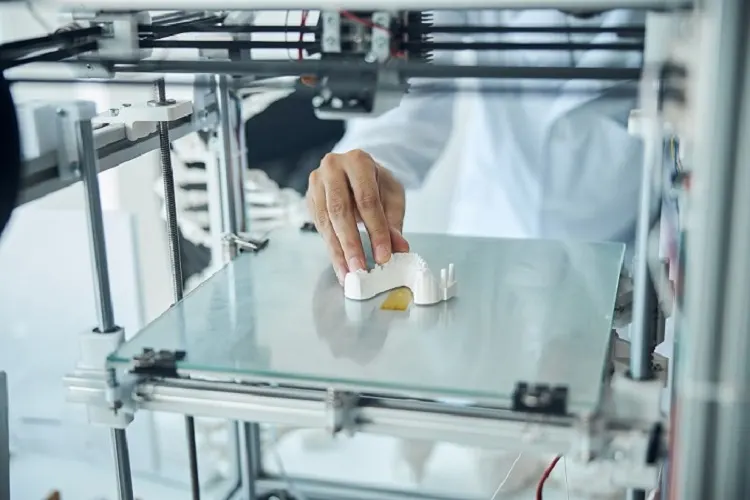
It’s tempting to grab your finished object hot off the printer immediately. But refrain because letting its temperature drop into room territory will solidify the object’s base and keep it from spreading all over the print bed. Instead, a cooled object will be much easier to pull off the printer.
Use a Scraping Tool
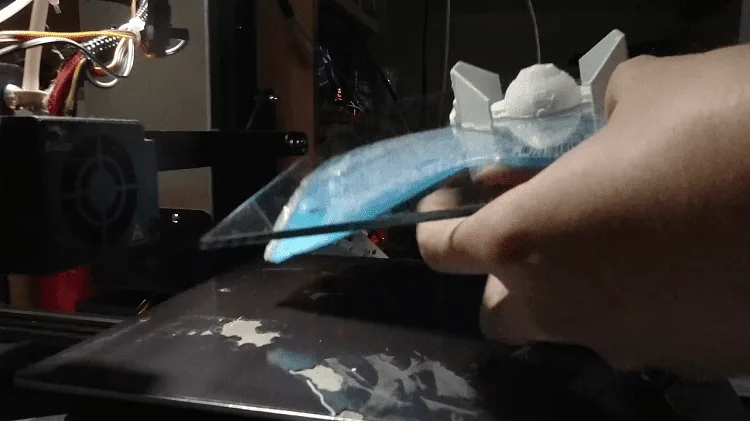
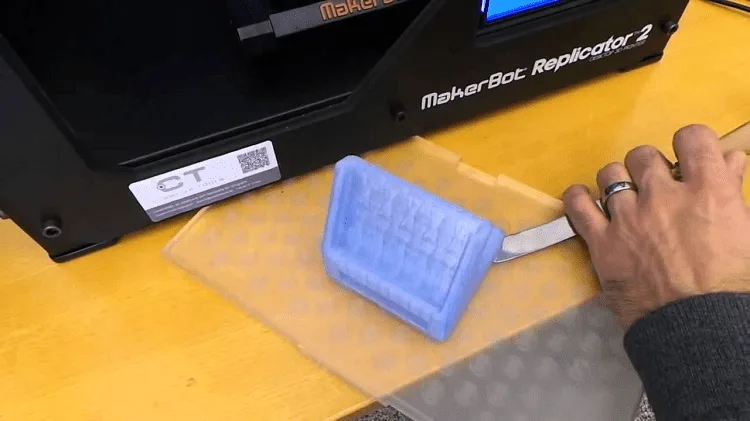
Some objects require force spread over a larger surface area to successfully make it off the heating bed. If your finished project has a wide base, or if you just want more leverage than your bare hands can provide, use a tool like a spatula to scrape under the object and pull it up.
Scraping tools with sharp edges can help loosen more stubborn prints. Be careful when using anything with a blade — protect your hands in case the tool goes in an unexpected direction.
Common Problems

Finished Print is Stuck
Unfortunately, you can be as prepared as possible and still have a finished object stick too much to your 3D printer’s heating bed. When that happens, don’t try to force anything past its literal breaking point. Instead, try the solutions we list below!
There are a number of ways to unstick a stubborn finished object from your printer’s heat bed. Remember to ease into each of these methods so that your object damage risk remains minimal.
Force
Your own strength is the best thing to try first. If your print does not want to come off the heating bed with your standard body leverage, slowly and evenly put more pressure into your efforts to snap it off.
Be very careful not to overdo this — if it’s still not working when you’re near your limit, stop and try another method that will spread the structural stress in a different way.
Dental Floss or Jewelry Wire
Both of these materials are great for combining the sharp precision of a bladed tool and the flexibility of your own hand. Hold a length of either taut between your fingers and pull the floss or wire back and forth in a sawing motion between the heating bed and the bottom layer of your printed object. The friction will loosen the print without accidentally chopping any of it off.
Reheat the Bed
After your finished object cools, you can further manipulate temperature to deliberately induce a contrast between the heating bed and the object’s bottom filament layer.
Less heat causes plastic to shrink, and more heat causes it to expand, so if your project won’t come off the heat bed, turn up the temperature on the bed so that it expands below the object. This will loosen the grip between the two and make it easier for the object to pop off.
Spray Compressed Air
Another way to change the temperature is to spray compressed air around the object’s bottom edge. Compressed air freezes the areas where it’s sprayed, so the area around your object’s bottom edge will contract, again easing the adhesive bond.
Run Heat Bed Under Water
One more temperature-manipulation method is to put your bed with the object still stuck to it under a tap. If you did not use any additional adhesives, go straight for the cold water and run it over both for a contraction of the bond.
If you did use adhesives on your heat bed, such as a glue stick, run the bed and object under warm water first to dissolve that, then run it under cold water for shrinkage.
Use Alcohol/Water Spray
This should be seen as a last resort because of the materials’ caustic properties. If your 3D printed object has remained stubborn and will not come off the heat bed using other methods, mix equal proportions of isopropyl alcohol and water. Then add that mixture to the base of your print, where it joins the bed.
This will soften the base of the object enough to come off the bed, but too much isopropyl alcohol at once will degrade the surface of your heat bed, so use sparingly.
Finished Print is Cracked or Warped
Sometimes, no matter how careful you are, your 3D print cracks or warps when you attempt to remove it from the heat bed. But don’t get too discouraged — you still have a few options.
Depending on the extent of the damage, you can use a surface finishing method to disguise fissures or even highlight them in a way that takes your object in another artistic direction.
Adhesive
The most obvious fix for broken finished objects is glue. If you have a few clean breaks in areas that still fit together, this should be your first step towards making your object whole again.
Cyanoacrylate, aka superglue, is the best and easiest option for most materials, although results may vary if you 3D print with non-standard materials that are more porous than PLA or ABS. (If that’s the case, check to see if your material would stick together better with epoxy, plumber’s cement, or another type of sticky stuff.)
Also, make sure that both surfaces you want to join are clean and even, which can be achieved with a gentle pass with sandpaper before you apply the adhesive.
Sanding
If the cracks don’t sever pieces completely, consider sanding the whole surface of your 3D printed object to obscure superficial nicks and scratches. This works well if you used a bladed tool to get the object off the bed and missed the mark a few times. Use a fine grain of sandpaper so you can smooth your object a little at a time for the best control.
- Note that this method will affect the look of your object in that it will smooth out the visible layers that are a hallmark of 3D printing. You’ll need to sand your entire object surface to keep its look uniform. Some makers actually prefer this look, and it can make fitted parts work better together as well as provide a great starting point for your next solution.
Glaze or Paint
Decorating your finished 3D printed object is a great way to transform any irregularities from prying it off the heat bed. It lets you personalize your final object in ways that aren’t possible with 3D printing alone while adding a layer of protection at the same time.
- Glazes are thin liquids that you spread over the surface of your 3D printed object to give it a specific type of finish. Usually, these glazes add some type of shine as well as smoothness, although that’s not always the case. Glazes can also add protective qualities to both your objects and the user of them. For instance, a new ceramic glaze just came out that will allow your 3D objects to be kiln-fired like traditional ceramics, giving them the extra strength and food safety of traditional dinnerware. Adding a glaze like this to a finished object can fill in and disguise small cracks and fissures from bed-prying mishaps.
- Glazes can also change the tint of your 3D objects, such as adding a golden shimmer, but if you want full-color coverage, use paint. Paint spreads like glaze but concentrates on adding pigment, so painting a 3D finished object is a better tool for disguise rather than reinforcement. This is especially good to keep in mind if you are 3D printing objects that are decorative. Something that is both, such as miniatures used in tabletop games, would benefit from a layer of each to stay useful and look good.
Print Residue is Stuck on Bed
If you have a hard time getting your 3D print piece off the heat bed, you may end up with pieces of its base stuck to your printer afterward.
That can negatively affect your bed adhesion and the quality of future prints, so it’s best to nip that in the bed before your next project.
Clean Your Heating Bed
Fortunately, this one is not complicated. A regular wipe down with isopropyl alcohol and a soft cloth will do wonders to clean residue from your heating bed. The same properties that make isopropyl alcohol the last resort for unsticking your finished object make it great for mopping up — the alcohol softens the print residue, which makes it easy to whisk away without any other special equipment.
- Set a regular cleaning regime for right after you use your 3D printer, so it becomes a habit and old residue doesn’t pile up.
Frequently Asked Questions
Question: What Causes 3D Prints to Stick to the Heat Bed?
Answer: Unfortunately, a lot of things can cause finished objects to stick to the heat bed of your printer. These range from incorrect temperature settings to a dirty printing surface to a z-axis that’s not high enough. The good news is there’s a number of solutions to all of these issues, and most can be solved with simple household tools that you more than likely already own.
Question: How Can I Prevent Prints from Sticking?
Answer: The best way to prevent prints from sticking is to be proactive. Keep your printing bed clean by wiping it down after every print and using a scraping tool to get whatever other residue remains when necessary. Calibrate your z-axis before you print.
That controls the height of your print and, therefore, how close your extruder nozzle is to the heating bed, and if it’s too close, that will compress your print layers, so they melt deeper into the printing bed. And use gentle adhesives, like hairspray or a glue stick, to add extra grip before you print. These are recommended because they’re easy to clean off the bed once you’re done.
For maintenance, after you print, have a nozzle bottle of compressed air or an alcohol and water solution at the ready, so you can target the exact spots on your print that are being stubborn.
Question: What Tools are Best for Removing Prints?
Answer: Broad-bladed scraping tools should be the first tools you grab to get your print off the heat bed. Take it from someone who has nicked her fair share of otherwise perfect objects — narrow, pointed tools will not cover the ground you need. Make sure your tools can get most, if not all, the way under the base of your object so that you can use your leverage to pry it off all at once.
I also like dental floss for objects with more complicated bases. The flexible nature of floss is a perfect balance between the friction you need to cut away a base and the give necessary to make sure the tool works with the particular shape of the object, no matter how unusual. Plus, floss is easy and cheap to find if you don’t already have any.
Enjoy Your Print!
3D printing is a wonderful mix of art and science that never ceases to amaze me (or the teenagers I have to impress at the library!). Use these tips and tools to keep your object perfect as it comes off the heating bed and into your life.


