- How to Remove 3D Print From Bed - May 31, 2022
- Autocad vs Inventor: Which Software is The Best? - April 5, 2022
- Autocad vs Revit [2022]: Which Is The Right Choice? - March 31, 2022
As 3D printing technology evolves, so do the tools that make it a reality. One particular leap forward shows what you can do with non-traditional extruding. Techniques like laser etching and printing add depth and versatility to all types of projects with the help of cutting-edge equipment like the Snapmaker vs Glowforge 3D printers.
Both the Snapmaker and Glowforge use lasers to go beyond the basics of traditional 3D printers, and it’s tempting to lump them together and classify them as something else entirely. However, each has its own unique addition to 3D printing as a whole. We’re here to examine those as well as compare their features to figure out which one is the best machine for your money. Read on to find out!
Before we get into specifics about each machine, here’s an overview on the main differences between them.
Table of Contents
Main Differences Between Snapmaker vs Glowforge
The Main Differences Between Snapmaker vs Glowforge are:
- The Snapmaker is a multi-purpose machine, able to perform 3D printing, laser engraving, and CNC carving, whereas the Glowforge is a single-purpose machine that only performs laser engraving.
- The Snapmaker is composed of modules that you can connect for usage and disconnect when you’re done with each process, whereas the Glowforge is all contained in one casing that you can’t alter.
- The Snapmaker’s first model costs under $500, while its 2.0 version costs under $1600, whereas the Glowforge costs from just under $2,000 to just under $6,000 depending on the model you choose.
The Snapmaker is designed with beginners in mind, offering a printer that is affordable, easy to use, and comes with plenty of features to experiment with!
Snapmaker
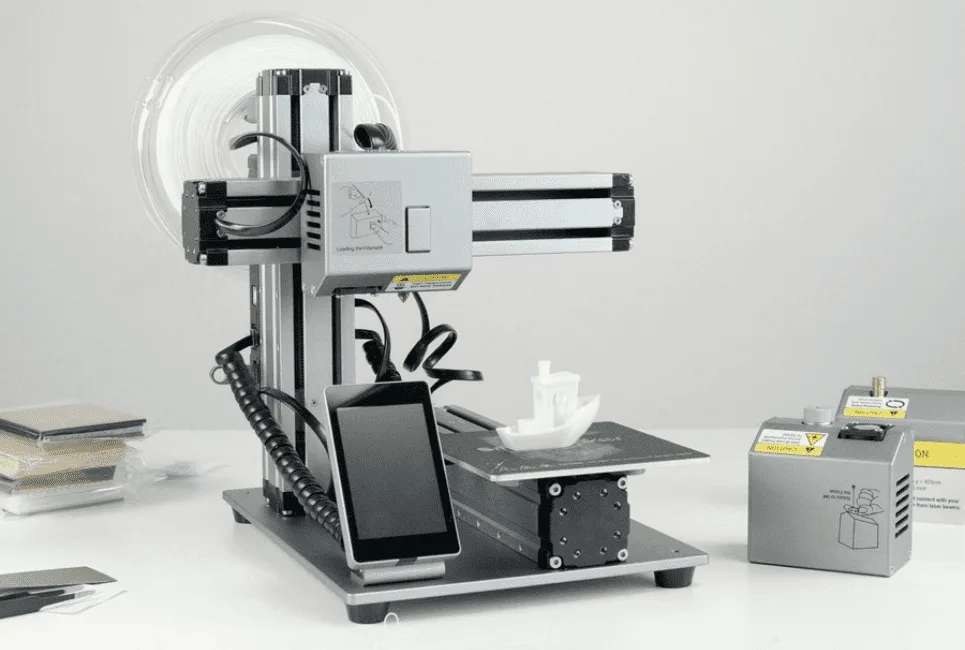
Snapmaker’s creators bill it as a time saver and game changer. Its first incarnation was born in late 2016 and early 2017 using $2.2 million the company raised through Kickstarer, and now they’re on version 2.0 through their own company.
Both versions of the Snapmaker are composed of linear construction modules, which means rotation motions of the machine are converted into linear movement along the X, Y, and Z axes to build up and work with 3D objects. The main body of the machine itself contains space for all three processes, albeit not at once, and each of the three process elements plus the design screen plug into a central connector that tells the printer what you want to do.
There’s a lot packed into this three-in-one machine that 3D prints, laser engraves, and CNC carves, so let’s dive into the details.
The Snapmaker is designed with beginners in mind, offering a printer that is affordable, easy to use, and comes with plenty of features to experiment with!
Technical Specifications
| Machine Dimensions | 11.4 in high x 10.7 in wide x 13.2 in long |
| Touchscreen size | 3.5 in |
| Power Requirement | 100 – 240V AC |
| Software | Comes with Luban, also supports 3rd parties for G-code files |
| Operating System | Windows, macOS, Linnux |
| Price | $449 for all three modules for first version; $1559 for 2.0 |
| 3D Printing Area | 4.9 in high x 4.9 in high x 4.9 in long |
| 3D Printing Layer Resolution | 50 – 300 microns |
| 3D Printing Print Head Travel Speed | Up to 100 mm per second |
| Laser Engraving Work Area | 4.9 in wide x 4.9 in long |
| Laser Engraving Power | 200 mW |
| Laser Engraving Wavelength | 405 nm |
| CNC Work Area | 2.0 in high x 3.5 in wide x 3.5 in long |
| CNC Shank Diameter | 3.175 mm |
| CNC Spindle Speed | 19,000 RPM |
Pros
- Three Processes in One Machine: The most obvious advantage to owning a Snapmaker is you can get three extensive maker processes for the price of a fraction of one. So what exactly are you paying for with each module?
- 3D Printing: This is the additive construction process of extruding layers of softened filament on top of each other in designed shapes to make 3D objects. A 3D printer uses an extruder nozzle that heats up and pulls the filament into the proper dimensions as designated by the computer-generated object plan. The process is used for all kinds of products, from creating unique figurines and other toys to manufacturing medical tools faster and cheaper than previous processes.
- Laser Engraving: As suggested by the name, laser engraving involves aiming a concentrated light source at a surface to burn designs, words, and pictures into it. The engraver is used like a stylus and can achieve a number of different effects to complete a complex visual, like how a painter combines different brushstrokes in one piece of art. The laser engraver is steered by computer rather than hand, basing its movements on the design in the program linked to it.
- CNC: These letters stand for Computer Numerical Control and apply to a carving mechanism that uses the same X, Y, and Z plane mapping as 3D printing. Unlike 3D printing, however, CNC is a subtractive manufacturing process; that means CNC removes materials to create the layers of its designs. CNC is often associated with wood carving, but it can also be used on metals, fabrics, and other materials to create a number of original designs on a variety of surfaces.
- Price: At less than $500 for a first generation, the Snapmaker would be a major bargain even if it only performed one process. Its module construction keeps the cost that low for all three, making it an excellent investment for those makers on a small budget, or those reluctant to spend too much on new processes before they find out if they actually enjoy them. The Snapmaker 2.0 does cost more at almost $1,600, but that remains a low price point for a three-in-one machine and gets you vital updates from the first generation.
- All-Metal Construction: The Snapmaker’s frame is made from aluminum alloys, which means other metals are added to aluminum to enhance its properties, most notably its strength. This gives the Snapmaker a solid base that keeps the tools on track with minimum jerking or slipping out of place while creating.
- Compact: Once again, module construction gives the Snapmaker a major win over its competitors. Because the equipment for each process plugs into the rest of the machine instead of as separate sections, the Snapmaker’s storage footprint remains smaller than most single-process printers.
- Direct Improvements in Version 2.0: Snapmaker started as a Kickstarter project, and the company listened closely to feedback from its first adapters. The second generation has added concrete details that directly answer a lot of the early users’ issues, such as an automatic calibration option and more power to the laser engraver; extended UI options on the touchscreen control; and more versatile room for each process’s workspace. The company seems to be actively taking notes for future versions as well.
Cons
- Lack of Speed: One common complaint about the Snapmaker is its slow 3D printing speed. Users and reviewers say this does not detract from the quality of the finished objects, but it does make them more tedious to build. If you’re looking for a faster 3D print, look elsewhere, because the 2.0 unfortunately does not improve on this.
- Limited Software: The Snapmaker comes loaded with their proprietary control software called Luban, which is intended to handle design and control for all three aspects of the Snapmaker. However, many users have found it less robust than they need for design and confusing to navigate for module control. The company itself even recommends Adobe products to create beyond a certain level of design sophistication, and you can use other third-party software to import G-code files.
- WiFi Connection Interferes with Local Machine Control: On the control side, the machine does not let you use local machine control when you use the device to connect with wifi. That means you can’t access cloud storage for downloads while you’re actively printing or engraving, which slows up your make time if you have a long queue of tasks on either side.
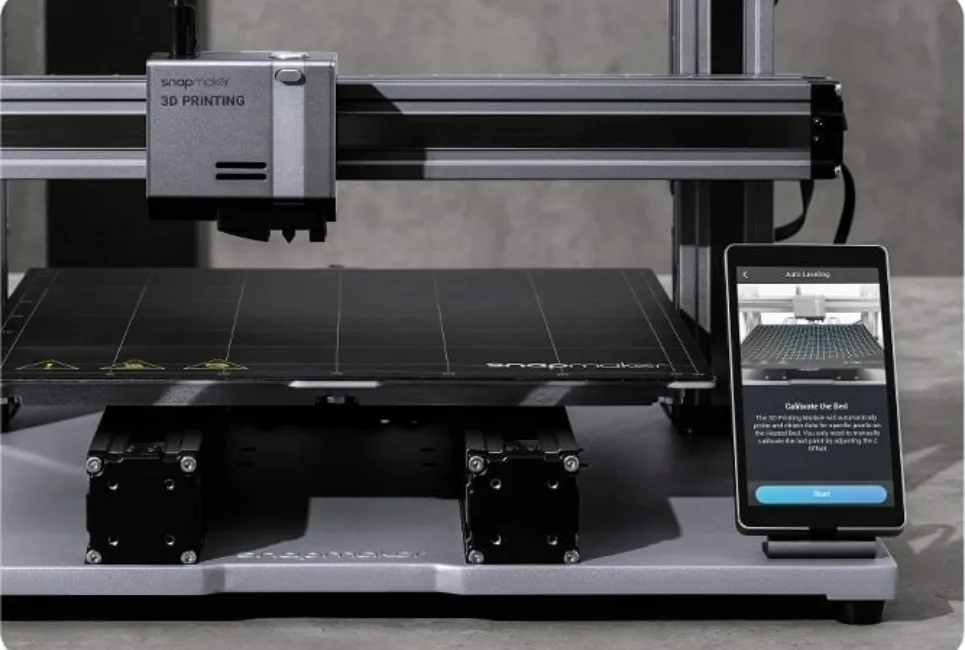
- Uneven First Layer of Prints: Another aspect of the Snapmaker that was not upgraded for the 2.0 is the bed-leveling process for the 3D printing surface. It can be adjusted in intervals as fine as 0.05mm, but that does not help the automatic leveling. Fortunately, you can turn off the automatic process and level your printing bed manually for a better result, but you still need to be extra watchful of your print’s first layer to make sure it doesn’t go wobbly.
The Snapmaker has its faults, but all in all, it’s a convenient machine built for solid use.
The Snapmaker is designed with beginners in mind, offering a printer that is affordable, easy to use, and comes with plenty of features to experiment with!
Glowforge
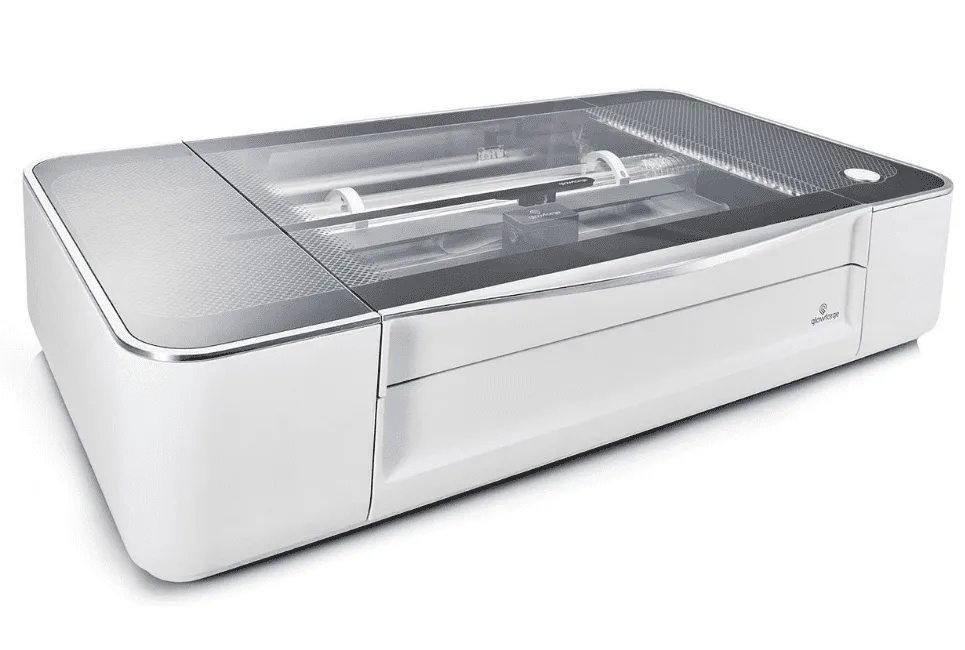
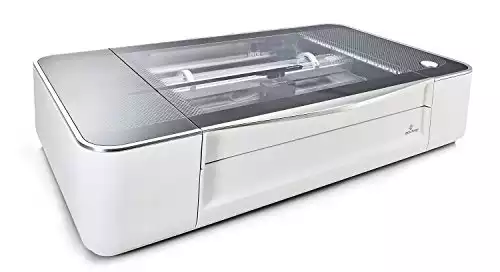
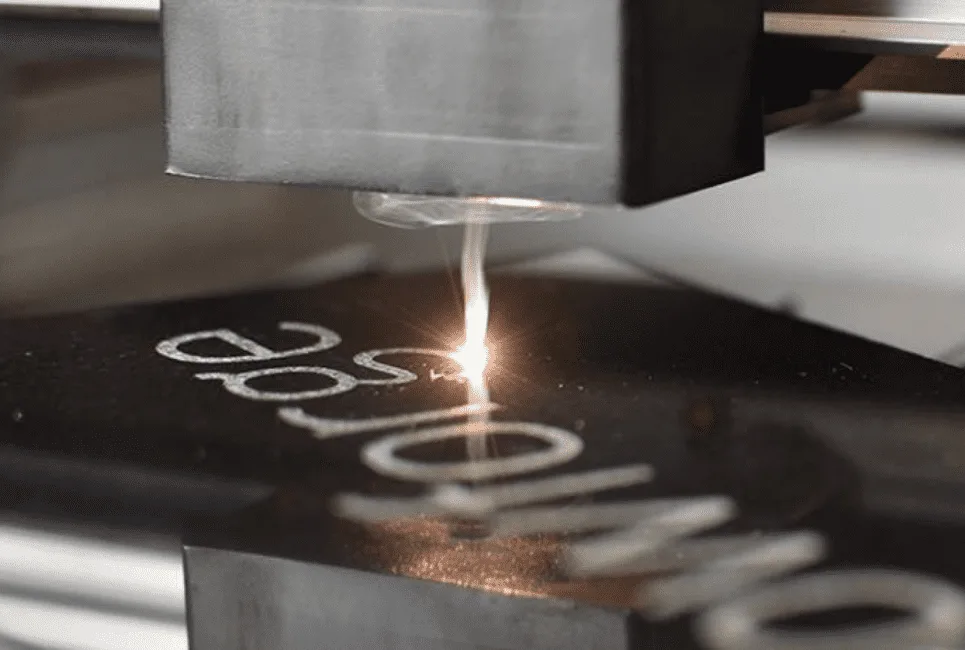
The Glowforge is also outside the range of traditional 3D printing. Although the company calls it a 3D laser printer, it doesn’t use extrusion technology to build up objects in layers. It’s more accurately described as a laser cutter, which means it too uses concentrated light beams to etch designs into a number of materials.
Based in Seattle, Washington, the Glowforge company says its products have printed over 2.1 million projects since they started selling in 2014 after their own successful crowdfunding period. Now there are three versions of the Glowforge meant to match the needs of everyone who needs laser printing, from casual hobbyists to large-scale businesses. Here’s how they stack up!
Technical Specifications
| Glowforge Basic | Glowforge Plus | Glowforge Pro | |
| Machine Dimensions | 38 in wide x 20.75 in tall x 8.25 in deep | ||
| Touchscreen Size | n/a (own device used) | ||
| Power Requirement | 110/220 VAC, 50 or 60 HZ outlet | ||
| Software | Glowforge web interface app | ||
| Operating System | Windows, macOS, or Linux | ||
| Price | $2,995 | $3,995 | $5,995 |
| Work Area | 11 in long x 19.5 in wide | 11 in long x 19.5 in wide | 19.5 in wide (no length limit) |
| Laser Power | 40W | 40W | 45W |
Pros
- Multiple Models: The Glowforge line has grown with its user base, and that means there are now three models to choose from. All operate the same, so if you’re looking to upgrade your current Glowforge, you won’t have to learn how to use it all over again. What you’ll get is more power and a few more inches of material feed space, which can make all the difference if you want to start laser cutting in bulk quantities. We’ve compared the specifications of each model in the section above.
- Compatible with Lots of Materials: Everything from acrylic to stone to leather is easily shaped by the Glowforge. It’s truly the master strength of this machine. Some users even etch fancy designs on foods with flat surfaces such as macaroons. Glowforge itself has a line of materials that are not only compatible with its machines but also come with QR codes you can scan to your Glowforge to automatically adjust the machine’s settings for the material before you use it.
- Large Printing Space: Each Glowforge model gives you 19.5 inches of width for your designs, and the Glowforge Pro adds a material extender to its feeder so you can use whatever length you want. Plus, your material can be up to 2 inches thick and still work perfectly within the laser cutter’s 1/100th of an inch precision.
- Excellent Detail: That precision joins forces with autofocus, live camera preview, and image editing help to create a professional level of laser etching no matter which model Glowforge you choose. All are able to show the nuances of photographs, the clean edges of designs, and everything in between using varying laser leveling and power.
- Easy to Use: The Glowforge is advertised as user-friendly, able to set up in half an hour or less, and reviews back up this claim. Users get started through the Glowforge app, where you set up a free account and connect to your machine. Then you can upload project images, look through the machine’s preview camera, adjust your designs, and choose the presets (or adjust manual settings) for your materials before you begin. Users claim the instructions on the app are easy to follow, direct, and intuitive, so you don’t spend your full first day trying to figure them out.
Cons
- Large Size: The Glowforge’s palatial printing space means that the machine itself has a big footprint for a desktop printing device. Fortunately, it’s in the shape of a rectangle with rounded edges, so it’s easy to find a storage area for it as long as you have the space.
- Expensive: Glowforge is great at what it does, but at almost $3,000 for the most basic model, that quality doesn’t come cheap. It’s a good investment if you’re looking for a mass-production engraver to make products that you’ll be selling, but if you’re strictly a hobbyist who’s not recouping costs, it may be out of your budgetary reach.
- Requires an Internet Connection: One major downfall to owning a Glowforge is that its controls don’t work unless they’re connected to the internet. That may not sound like a big deal when so many of our other devices are the same, but users in areas with spotty coverage will experience halting service from their Glowforge. And a need for the internet takes away the Glowforge’s accessibility from demographics who don’t have access to their own connection at all.
- Dangerous Fumes: The Glowforge has one major safety issue to look out for, and that’s the amount of fumes it produces while performing its tasks. You must use your Glowforge in a well-ventilated room, whether that’s one with windows that can open or fan hoods. If you don’t have space with either, you can purchase a ventilator from Glowforge and connect it to your machine, but that will cost you another $400 or so.
Like all Glowforge printers, the Glowforge Basic uses onboard cameras and a powerful laser to make it easy to create beautiful products at home. You'll be showing off your first print in under 30 minutes.
Push the button and the powerful 40 watt laser creates meaningful gifts for your friends, unique products to sell, or something personalized just for you.
The Glowforge Pro is the ultimate option for home, business, or school. It prints truly enormous objects like furniture with the exclusive Pro Passthrough, allowing you to use infinitely long materials.
Frequently Asked Questions
Question: Are the Snapmaker and Glowforge 3D Printers?
Answer: Neither one are strictly traditional 3D printers. The Snapmaker does have an extrusion-based 3D printing module along with its laser engraving and CNC. The Glowforge does not have any 3D printing capabilities but rather is a full laser engraving machine.
Question: How User Friendly is Each Machine?
Answer: Both the Snapmaker and the Glowforge rely on software controls designed to get you started right out of the box. Snapmaker reviewers say it takes a little bit of paging around to find everything you need in their interface, whereas Glowforge users say its app controller walks you through the process thoroughly. Once past that first session, users of each say both are straightforward and easy to work with.
Question: Where Can I Go for More Information?
Answer: We link the Snapmaker website above, and the Glowforge website also connects you to company employees and user community members who can tell you all about their own experiences.
Final Buying Decision
While the Glowforge’s capabilities are impressive, we choose the Snapmaker for our final buying decision. It wins because of its convenient way to change between multiple processes, its hobby-friendly price, and its company’s proven commitment to upgrades that consistently improve its already-good services.
Check out the Snapmaker website to get started with your own.
The Snapmaker is designed with beginners in mind, offering a printer that is affordable, easy to use, and comes with plenty of features to experiment with!


